 Bookmark
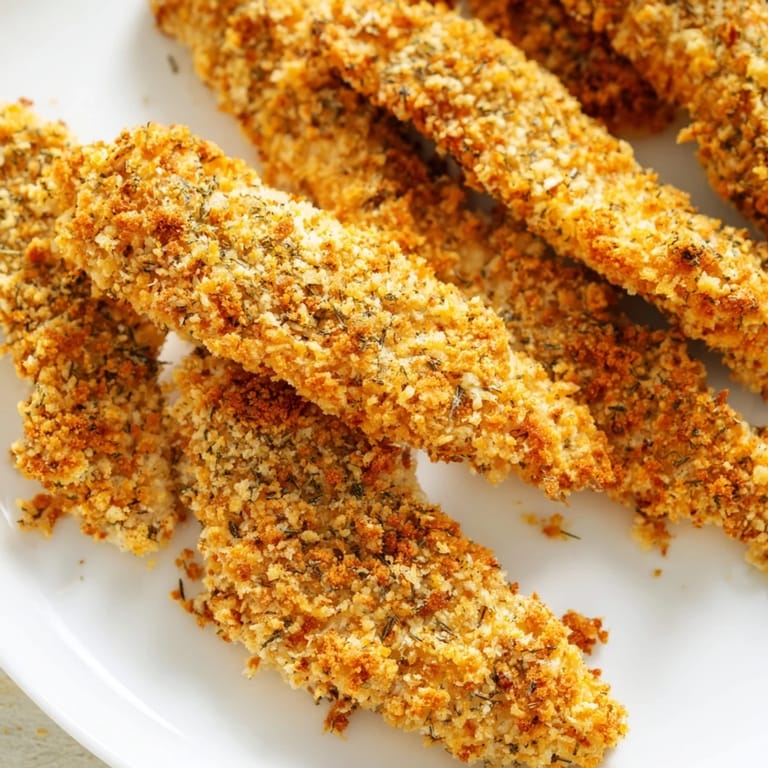
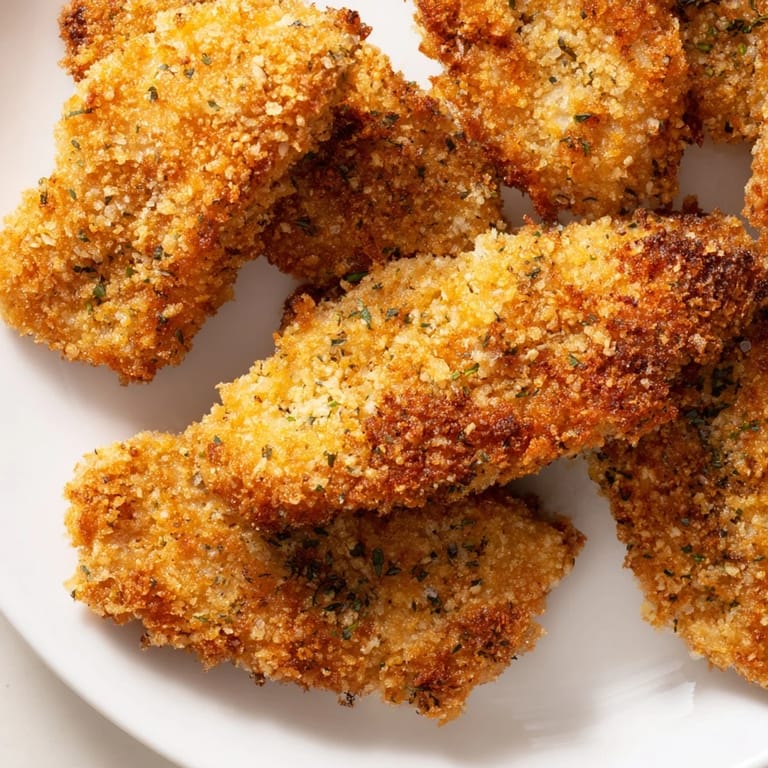
 My oven timer went off just as my neighbor knocked on the door, and the smell of garlic and herbs pulled her straight into the kitchen. She stood there staring at the tray of golden chicken strips cooling on the counter, and before I could offer, she'd already grabbed one. The crunch echoed through the room, and she looked at me like I'd just revealed a magic trick. That's the thing about panko: it doesn't just coat chicken, it transforms it into something people can't stop reaching for.
I started making these on weeknights when I needed something fast but didn't want to compromise on texture. My youngest used to push breaded chicken around his plate, but the first time I used panko with a hint of smoked paprika, he ate four strips without looking up. Now it's the recipe I turn to when I want dinner to feel special without the effort of frying or marinating for hours. There's something satisfying about pulling a tray from the oven and hearing that crisp sound when you transfer the strips to a plate.
Ingredients
- Boneless, skinless chicken breasts or tenders: Tenders cook faster and stay juicy, but breasts work beautifully if you slice them into even strips so everything finishes at the same time.
- Salt and black pepper: Simple seasoning on the raw chicken ensures flavor goes all the way through, not just on the surface.
- All-purpose flour: This first dry layer helps the egg mixture cling tightly, which is the secret to breading that doesn't fall off.
- Eggs: Whisking them with a bit of mayonnaise creates a thicker coating that holds more panko and adds a subtle richness.
- Mayonnaise or Greek yogurt: Either one keeps the chicken moist inside while helping the breading stick like glue.
- Panko breadcrumbs: These Japanese-style crumbs are larger and airier than regular breadcrumbs, which is why they crisp up so much better in the oven.
- Dried Italian herbs: A mix of oregano, thyme, and basil brings a savory warmth that makes the whole kitchen smell like a trattoria.
- Garlic powder: It disperses evenly through the breading and toasts into a deep, roasted flavor as it bakes.
- Smoked paprika: Just half a teaspoon adds a subtle smokiness that tricks people into thinking you grilled the chicken.
- Cayenne pepper: Optional but worth it if you like a tiny kick that sneaks up at the end of each bite.
- Olive oil: A light drizzle or spray before baking encourages the panko to turn golden and crunchy instead of staying pale.
Tired of Takeout? 🥡
Get 10 meals you can make faster than delivery arrives. Seriously.
One email. No spam. Unsubscribe anytime.
Instructions
- Preheat and Prep:
- Set your oven to 220°C (425°F) and line a baking sheet with parchment or, even better, a wire rack so air circulates under the chicken. The rack is a game changer for crispiness on all sides.
- Cut and Season the Chicken:
- Pat the chicken completely dry with paper towels, then slice it into strips about 2 cm wide. Sprinkle both sides with salt and pepper so the flavor starts from within.
- Set Up Your Breading Station:
- Place flour in the first bowl, whisk eggs with mayonnaise in the second until smooth, and mix panko with all the herbs and spices in the third. Line them up in order so you can move quickly without stopping to wash your hands.
- Coat Each Strip:
- Dredge a chicken strip in flour, shake off the excess, dip it into the egg mixture until fully covered, then press it into the panko mixture on both sides. Use one hand for wet ingredients and one for dry to keep your fingers from turning into breaded clumps.
- Arrange and Oil:
- Lay the coated strips on your prepared baking sheet with a little space between each one. Drizzle or spray them lightly with olive oil so the tops can brown.
- Bake and Flip:
- Bake for 18 to 22 minutes, flipping the strips halfway through so both sides get golden. They're done when the internal temperature hits 74°C (165°F) and the coating looks crisp and toasted.
- Rest Before Serving:
- Let the strips cool on the tray for 2 to 3 minutes. This brief rest lets the breading set and reach peak crunch instead of steaming if you pile them up right away.
 Bookmark
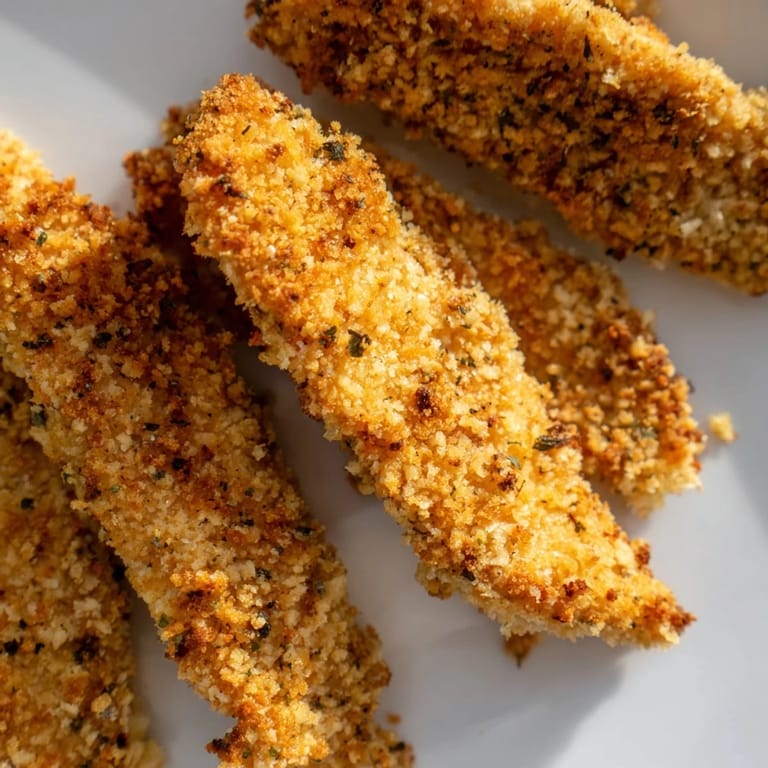
 The first time I made these for a casual Friday dinner, I set out three dipping sauces just for fun: honey mustard, ranch, and a spicy sriracha mayo I whipped up on a whim. My husband dipped the same strip into all three before taking a bite, and suddenly everyone at the table was experimenting with their own combinations. It turned into this informal tasting game where we debated which sauce made the panko sing the loudest. That night, the chicken strips became less about dinner and more about the laughter and ridiculous dipping debates that stretched way past bedtime.
Serving Suggestions
These strips shine alongside a simple green salad with a tart vinaigrette that cuts through the richness, or next to roasted sweet potato wedges for a balance of crispy and creamy. I've also tucked them into soft tortillas with shredded cabbage and a squeeze of lime for quick tacos that feel more exciting than plain chicken. If you're feeding a crowd, pile them on a big platter with a few small bowls of different dips and let everyone build their own plate. A glass of chilled Sauvignon Blanc or a crisp lager pairs beautifully, but honestly, cold lemonade works just as well on a warm evening.
Storage and Reheating
Leftovers keep in an airtight container in the fridge for up to three days, though they rarely last that long in my house. To reheat without losing the crunch, spread them on a baking sheet and warm them in a 200°C (400°F) oven for about 8 minutes instead of using the microwave, which turns them soggy. I've also tucked cold strips into a lunchbox with a small container of dip, and they still taste great at room temperature. If you want to freeze them, do it after breading but before baking: lay them on a tray until solid, then transfer to a freezer bag and bake straight from frozen, adding a few extra minutes to the cooking time.
Variations and Swaps
For a gluten-free version, swap in gluten-free panko and flour without changing anything else in the process. If you want a richer flavor, toss a handful of grated Parmesan into the panko mixture before breading, which adds a salty, nutty depth that caramelizes beautifully. I've also tried using crushed cornflakes instead of panko when I ran out, and while it wasn't quite the same airy crunch, it still delivered a satisfying crisp. You can adjust the spice level by doubling the cayenne or adding a pinch of chili flakes, or keep it mild by leaving out the heat entirely and leaning into extra garlic powder and herbs.
- Try buttermilk instead of the egg and mayo mixture for a tangy Southern-style twist.
- Use chicken thighs if you prefer darker meat that stays extra juicy even if slightly overcooked.
- Serve with a drizzle of hot honey over the top for a sweet and spicy finish that's wildly addictive.
 Bookmark
 Every time I pull these strips from the oven and hear that first satisfying crunch, I'm reminded why simple recipes often become the most memorable ones. They bring people to the table without fuss, and somehow always taste better than you expect.
Recipe Questions
- → How do I get the crispiest coating?
Use a wire rack instead of a solid baking sheet to allow air circulation underneath. Drizzle or spray the coated strips with olive oil before baking, and flip halfway through cooking. The combination of these techniques ensures maximum crispiness without deep frying.
- → Can I prepare these strips ahead of time?
Yes. Bread the chicken strips up to 4 hours ahead and refrigerate uncovered on a baking sheet. This helps the coating adhere better. Bake directly from the refrigerator, adding 2-3 minutes to the cooking time.
- → What temperature should chicken reach when cooked?
The internal temperature must reach 74°C (165°F) when measured with a meat thermometer at the thickest part. This ensures food safety while keeping the meat tender and juicy.
- → How can I make this gluten-free?
Substitute all-purpose flour with a gluten-free flour blend and use certified gluten-free panko breadcrumbs. Check your mayonnaise or yogurt label for hidden gluten. Everything else remains the same—the coating and texture will be identical.
- → What dipping sauces pair well with these strips?
Honey mustard, ranch, and spicy sriracha mayo are excellent choices. You can also try barbecue sauce, tzatziki, or a simple lemon aioli for variety. Serve sauces chilled for contrast with the warm, crispy strips.
- → Can I freeze breaded strips for later?
Absolutely. Freeze breaded, unbaked strips on a baking sheet for 2 hours, then transfer to freezer bags for up to 3 months. Bake directly from frozen, adding 5-7 minutes to the cooking time until golden and heated through.