 Bookmark
 The first time I attempted red velvet cake, I accidentally doubled the food coloring and ended up with something that looked more like a science experiment than a dessert. My husband walked into the kitchen, eyes wide, and asked if I was making a cake or radioactive slime. We laughed about it for days, and that bright red batter became a running joke in our house every time I pulled out the mixing bowls.
Last Christmas, my grandmother tasted this cake and announced it was better than the one from the bakery in her hometown that closed thirty years ago. She made me write down the recipe right then and there, on the back of a Christmas card, which I found tucked in her recipe box after she passed away. Some recipes are just worth keeping close.
Ingredients
- All-purpose flour: The structure builder that gives this cake its tender crumb and perfect height
- Unsweetened cocoa powder: Just enough to give a subtle chocolate background without overpowering that signature red velvet taste
- Baking soda: Works with the buttermilk and vinegar to create the cakes signature rise and velvety texture
- Salt: A pinch that balances the sweetness and wakes up all the flavors
- Granulated sugar: Sweetens and tenderizes while helping create that beautiful golden crust
- Unsalted butter: Room temperature butter creams perfectly and adds rich flavor
- Large eggs: Room temperature eggs incorporate better and provide structure
- Buttermilk: The secret ingredient that adds tang and tenderness, reacting with baking soda for lift
- Vanilla extract: Pure vanilla adds warmth and rounds out all the flavors
- White vinegar: Enhances the red color from the food coloring and activates the baking soda
- Red food coloring: Gel coloring gives a deeper, more professional red than liquid
- Vegetable oil: Keeps the cake incredibly moist and prevents it from drying out
- Cream cheese: Full fat, softened cream cheese makes the frosting decadent and spreadable
- Powdered sugar: Sifted sugar prevents lumps and creates silky smooth frosting
Tired of Takeout? 🥡
Get 10 meals you can make faster than delivery arrives. Seriously.
One email. No spam. Unsubscribe anytime.
Instructions
- Prep your pans and oven:
- Heat your oven to 350°F and generously grease two 9-inch round pans with butter, then dust with flour, tapping out any excess
- Mix the dry ingredients:
- Sift together the flour, cocoa powder, baking soda, and salt into a medium bowl, using a whisk to break up any lumps
- Cream the butter and sugar:
- Beat the sugar and softened butter until its pale and fluffy, about 3 minutes, then add eggs one at a time
- Add the wet ingredients:
- Mix in the oil, vanilla, and vinegar until everything is well combined and smooth
- Create the red mixture:
- Whisk the buttermilk and food coloring together in a small bowl until evenly distributed
- Combine everything:
- Add the dry ingredients in three parts, alternating with the buttermilk mixture, mixing just until you no longer see flour
- Bake the layers:
- Divide the batter between your prepared pans and bake for 28 to 30 minutes until a toothpick comes out clean
- Cool completely:
- Let the cakes rest in their pans for 10 minutes before turning them out onto wire racks to cool entirely
- Make the frosting:
- Beat the softened cream cheese and butter until smooth, then gradually add sifted powdered sugar, vanilla, and salt until fluffy
- Frost the cake:
- Once the cakes are completely cool, spread frosting between the layers and over the top and sides
 Bookmark
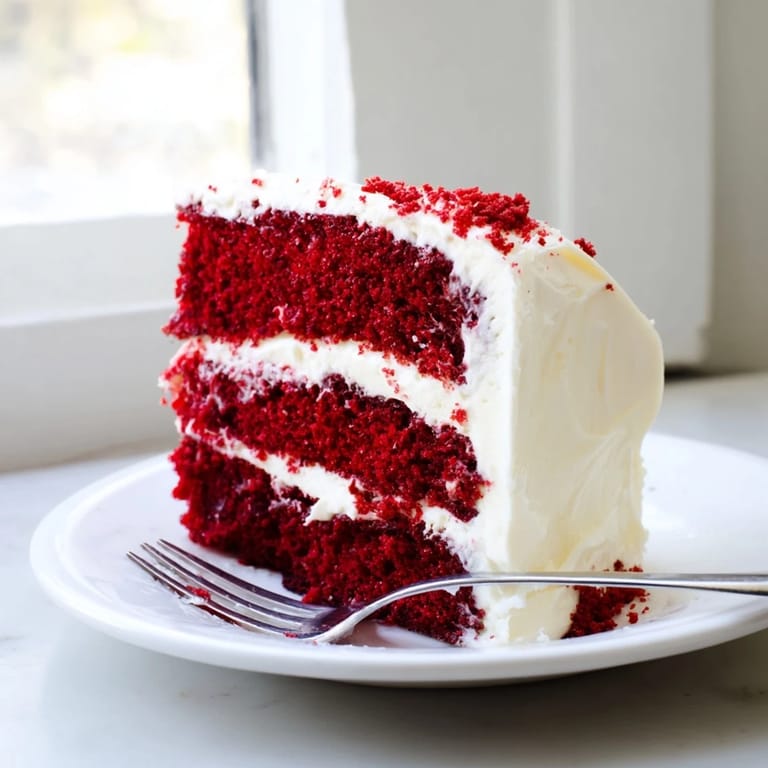
 My daughter requested this cake for her sixth birthday, and when she saw the layers stacked with that snowy white frosting against the crimson crumb, she whispered it looked like something from a fairy tale. That moment of watching her face light up made every minute of baking worth it.
Making It Ahead
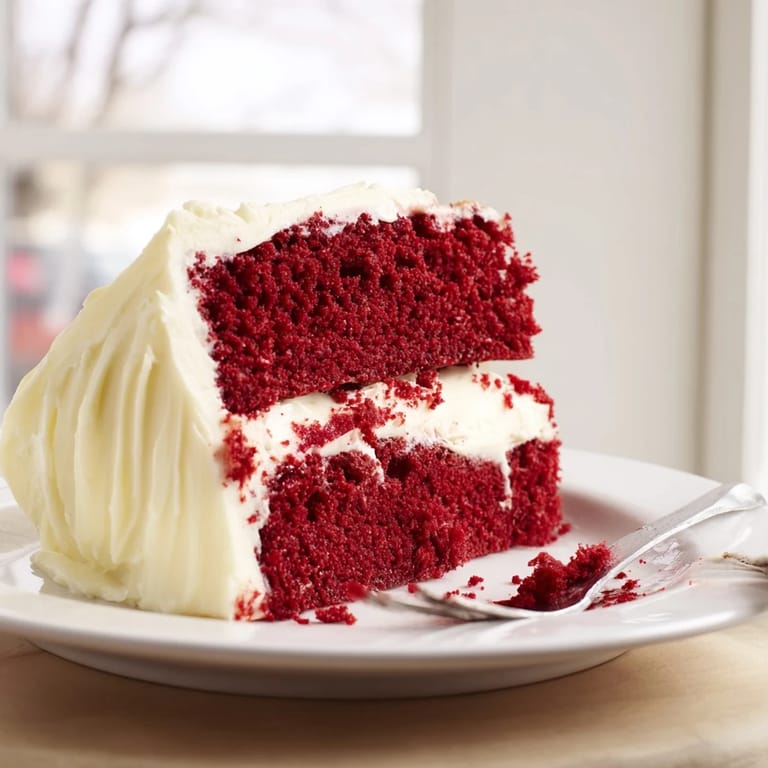
The cake layers can be wrapped tightly in plastic and frozen for up to a month. Thaw them in the refrigerator overnight before frosting. Ive learned this the hard way after attempting to frost a slightly frozen cake and ending up with condensation under the frosting.
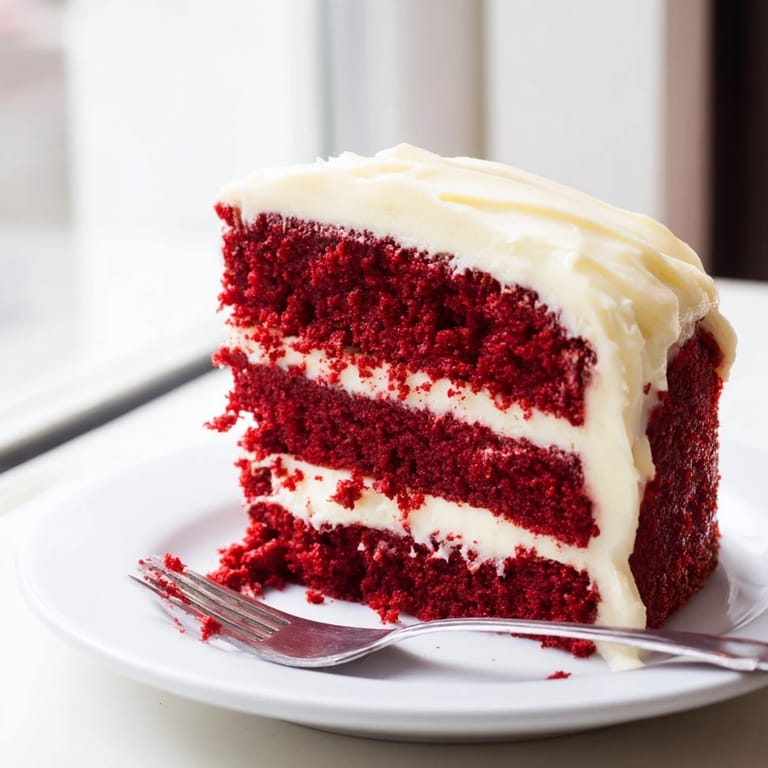
Getting The Right Red
Gel food coloring is absolutely worth the extra trip to the store. Liquid coloring can throw off your batter consistency, and you will need half the amount to achieve that deep, restaurant-quality red that makes people stop and stare.
Serving And Storing
This cake actually tastes better on day two, after the flavors have had time to settle and the frosting has softened the crumb slightly. Keep it refrigerated, but let it sit at room temperature for 30 minutes before serving for the best texture and flavor.
- Slice with a sharp knife dipped in hot water for clean cuts through the frosting
- Add fresh raspberries on top for a stunning contrast and tart brightness
- The cream cheese frosting pipes beautifully if you want to add decorations
 Bookmark
 Every time I make this cake now, I think about how recipes are really just stories we tell with our hands, and the best ones always get passed down.
Recipe Questions
- → Why does red velvet cake have vinegar?
The vinegar reacts with the buttermilk and baking soda to create extra tenderness and enhance the reddish color. It also adds a subtle tang that balances the sweetness.
- → Can I make red velvet cake ahead of time?
Yes, the unfrosted cakes can be wrapped tightly and stored at room temperature for up to 2 days or frozen for up to 3 months. Thaw completely before frosting.
- → Why is my red velvet cake dry?
Overbaking is the most common cause. Check for doneness a few minutes early, and remember the cake continues cooking as it cools in the pan.
- → What makes red velvet different from chocolate cake?
Red velvet has a much milder chocolate flavor and uses buttermilk and vinegar for a distinctive tangy taste. The texture is finer and more velvety than traditional chocolate cake.
- → Should red velvet cake be refrigerated?
Yes, due to the cream cheese frosting. Keep covered and refrigerated for up to 5 days. Bring to room temperature 30 minutes before serving for the best texture and flavor.