 Bookmark
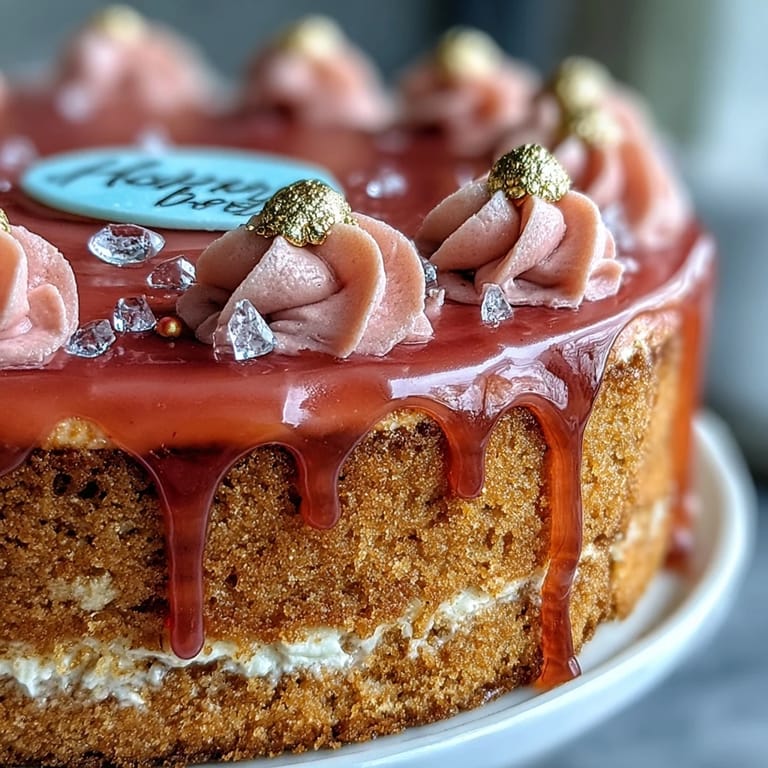
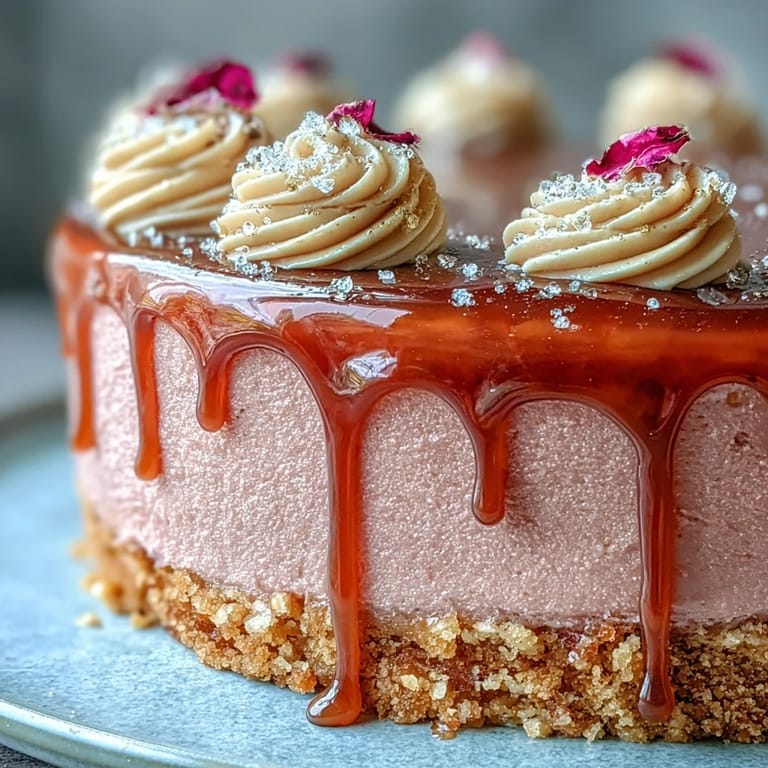
 Sometimes you set out to bake something for a special occasion, and the whole kitchen transforms with the anticipation. Making this rosé velvet cake for my friend’s bridal shower, I found myself humming along with the clink of measuring cups and nearly gasping at the soft pastel pink coming together in the bowl. There was a certain sparkle in the air, maybe from the afternoon light or maybe from an extra sprinkle of edible glitter from my sleeve. The gentle floral aroma of rosé felt unexpectedly celebratory, like a secret toast all my own. It was one of those rare cakes that feels festive even before you add any decoration.
I still remember balancing the finished cake on my lap in the car, careful not to let the golden drips slide off during a sharp turn—while my friend giggled at my dramatic concentration. There’s something about presenting a cake that shimmers with real gold and rose hues that had the whole table pausing, phones out, eager to celebrate more than just a wedding-to-be.
Ingredients
- All-purpose flour: Sifting really gives the cake that light, plush texture which makes slicing neat and layered.
- Granulated sugar: Creams perfectly into the wet mixture and helps those pink tones pop.
- Baking soda: Make sure it’s fresh for the fluffiest rise—trust me, it matters!
- Fine salt: Just a pinch keeps every flavor balanced and lets the wine carry through.
- Cocoa powder (unsweetened): Only a little, but it gives depth so the rosé isn’t too sweet or one-note.
- Vegetable oil: This is the secret for extra-moist, soft layers that stay tender after chilling.
- Large eggs (room temperature): Give the cake structure and lush richness; warming them first smooths the batter.
- Buttermilk (room temperature): Tangy and creamy, it brings out the rosé and keeps crumbs tender.
- Rosé wine: Choose a dry or sparkling bottle for subtle floral fragrance—plus, there’s enough left to toast the baker.
- Vanilla extract: Rounds out the flavors and adds a cozy comfort beneath the fancy exterior.
- White vinegar: Classic for velvet cakes, it fluffs the crumb and makes the color pop.
- Pink or rose gel food coloring: Go slowly here—a little makes a perfect blush, and you control the hue.
- Unsalted butter (room temperature): For the buttercream, it must be soft for that silky, aerated finish.
- Powdered sugar (sifted): Essential for a smooth, cloudlike buttercream that pipes and spreads easily.
- Heavy cream: Creates the perfect runny consistency for the gold drip—don’t overheat or it can separate.
- White chocolate chips: Melt into a glossy base for the edible gold paint to cling to.
- Edible gold luster dust: Only the edible kind! It’s what turns the drip into a showstopper.
- Vodka or clear lemon extract: Mixes with luster dust to make gold ‘paint’ that dries quickly.
- Additional edible gold accents, rose petals, or berries (optional): These are for drama—scatter them for an almost regal finish.
Tired of Takeout? 🥡
Get 10 meals you can make faster than delivery arrives. Seriously.
One email. No spam. Unsubscribe anytime.
Instructions
- Prepping the pans:
- Warm up the oven to 350°F (175°C) and line three cake pans with parchment—the parchment makes unmolding effortless.
- Mixing the dry ingredients:
- Sift flour, sugar, baking soda, salt, and cocoa together, watching the cocoa trail through the pale flour—it’s oddly satisfying!
- Blending the wet ingredients:
- Whisk oil, eggs, buttermilk, rosé, vanilla, and vinegar until you get a silky, slightly frothy mix that already smells heavenly.
- Combining and adding color:
- Pour the wet into the dry and fold gently; swirl in the food coloring a little at a time until it's pink perfection (and resist overmixing).
- Baking the cakes:
- Divide evenly between pans and bake 30-35 minutes—your kitchen will start to smell subtly floral and sweet by minute twenty-five.
- Cooling down:
- Let the cakes rest in their pans for 10 minutes, then turn them onto a rack—don’t rush this or the layers will be too soft.
- Crafting the buttercream:
- Beat butter until almost white, then add powdered sugar bit by bit; splash in rosé and vanilla, whip until fluffy, and sneak a lick if no one’s looking.
- Stacking and crumb-coating:
- Level the cakes, stack them with generous amounts of buttercream, then swipe a thin layer all over and chill so crumbs don’t sneak into the final coat.
- Final buttercream and chill:
- Finish with a smooth, thick buttercream all over and chill again—this makes it easier for the gold drip to set perfectly.
- Making the gold drip:
- Melt white chocolate with cream, let it cool (otherwise it’ll melt the buttercream), then gently spoon over the edges for picture-perfect drips.
- Painting with gold:
- Mix edible gold luster dust and vodka or extract, then paint over the drips for that magical shimmer—take your time and enjoy the tiny brushstrokes.
- Decorating:
- Adorn the top with extra gold accents, scattered rose petals or berries, and then step back to admire your handiwork.
 Bookmark
 There was a hush around the dessert table as everyone waited for the first slice to reveal its rosy interior—and then laughter as gold dust stuck to everyone’s fingers. Somehow, this cake turned a sweet moment into an absolute memory, and I loved seeing friends sneak back for seconds of both cake and conversation.
What Makes the Gold Drip Work
The first time I attempted the drip, I rushed and tried painting before the chocolate was cool which led to streaks and smudges. Letting the white chocolate set on the cake before brushing on the gold turns each drip into a polished highlight instead of a liquid mess. Using a clean, small paintbrush just for food makes all the difference—dedicate one to edible decor and you'll avoid accidental color mixing forever.
Best Rosé Wines for Baking
Through trial and error, I've found that a crisp, dry rosé imparts a soft floral hint without making the cake taste boozy. Avoid overly sweet rosés, as they can overwhelm the delicate vanilla and cocoa flavors. Sparkling rosé is particularly fun for celebrations—a few bubbles in the batter is a baker’s treat not just for drinking.
Decorating and Serving Memories
I've turned decorating this cake into a group event—assigning the edible glitter task always leads to laughter and a little competitive artistry. Remember to save a few rose petals until the end for a last flourish; the gold shimmer catches the light just before you bring it out. The final cake always manages to look more impressive in person than any phone photo can capture.
- Always use edible flowers for safety—never ones from the florist.
- Slice with a hot knife for restaurant-style pieces.
- Keep leftovers in the fridge, but serve at room temp so every forkful is fluffy.
 Bookmark
 Cake like this isn’t just dessert—it’s a celebration centerpiece that might just outshine the gifts. Happy baking, and may your kitchen always be filled with golden moments!
Recipe Questions
- → Can I omit or replace the rosé wine?
Yes—substitute an equal amount of apple juice, white grape juice plus a splash of lemon, or a nonalcoholic rosé for flavor balance. Keep liquid volume the same and adjust sweetness if needed.
- → How do I keep the cake layers moist?
Use room-temperature ingredients, avoid overmixing, and watch baking time closely. The oil and buttermilk in the batter help retain moisture—remove layers from pans after 10 minutes and cool on a rack to finish gently.
- → How is the edible gold drip made safe?
Make the drip from melted white chocolate and cream, cooled slightly before using. Mix edible luster dust with a food-safe clear spirit or clear extract to paint the set drip. Only use luster dust labeled food-grade.
- → Best way to get a smooth buttercream finish?
Apply a thin crumb coat and chill for 20–30 minutes, then spread the final layer with an offset spatula while rotating the cake. A hot spatula smoothed with brief strokes can refine the surface.
- → Can this be made ahead and how should it be stored?
Yes. Assemble and chill overnight for best flavor. Store covered in the refrigerator; bring to room temperature before serving. Layers can be wrapped and frozen for longer storage—thaw in the fridge before assembling.
- → Should I use sparkling or still rosé?
Either works: sparkling rosé adds light effervescence and extra brightness, while a dry still rosé gives a subtle floral fruit note. Choose based on desired intensity and aroma.