 Bookmark
 The tap of the rolling pin on my kitchen counter was almost drowned out by laughter as my friend and I set out to create a batch of graduation cookies late one spring evening. There was no grand plan—just a craving for something sweet and the excuse to play with gold luster dust that had been sitting in my pantry for months. Drafting diploma scrolls out of dough felt oddly satisfying, and we joked about which cap-shaped cookie looked the most scholarly. The subtle aroma of butter crept into our conversation, and for a few hours, the kitchen turned into a lighthearted celebration of accomplishment—ours or someone else’s, it didn’t really matter. These cookies really do turn an ordinary day into something to remember, with every detail sparkling in the light.
One rainy afternoon, I brought these graduation cookies to a backyard party, nervously balancing a tray as the drizzle threatened the icing. Instead of disaster, there was pure delight—chin lifts, laughter, and crumbs everywhere as guests tried to guess which diploma had the most gold. Even my uncle, who pretends he doesn't have a sweet tooth, slyly pocketed a couple for later. That memory still makes me smile every time I reach for the diploma cutter.
Ingredients
- All-purpose flour: Gives the cookies their sturdy structure—measure carefully to prevent spreading.
- Unsalted butter: Use room temperature for effortless creaming and that perfect melt-in-your-mouth texture.
- Granulated sugar: Adds sweetness and helps the edges stay crisp when baked.
- Egg: Brings everything together for consistent, tender cookies every time.
- Pure vanilla extract: The subtle aroma rounds out each bite—splurge for real vanilla if you can.
- Almond extract (optional): A secret twist I like for extra depth; try lemon for a zestier version.
- Salt: Just enough to keep the flavors bright, never flat.
- Powdered sugar: Sift well for impeccably smooth royal icing that glides and sets perfectly.
- Egg whites or meringue powder: These will help your icing set to a glossy, bakery finish—no soft, sticky mess.
- Cream of tartar: It stabilizes the royal icing so your intricate piped lines don’t sink or run.
- Black gel food coloring: The only way to get that rich color on the caps without thinning your icing.
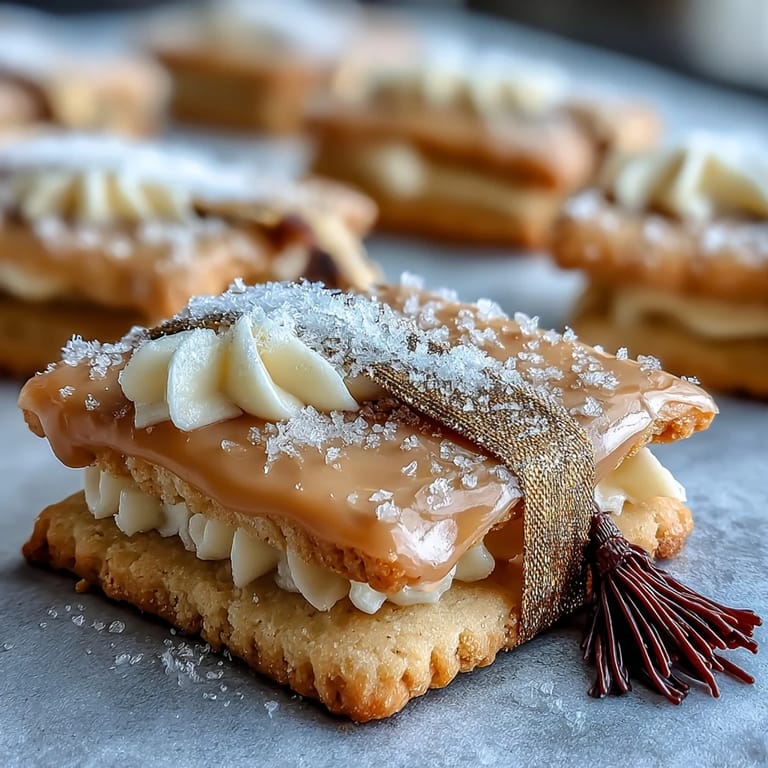
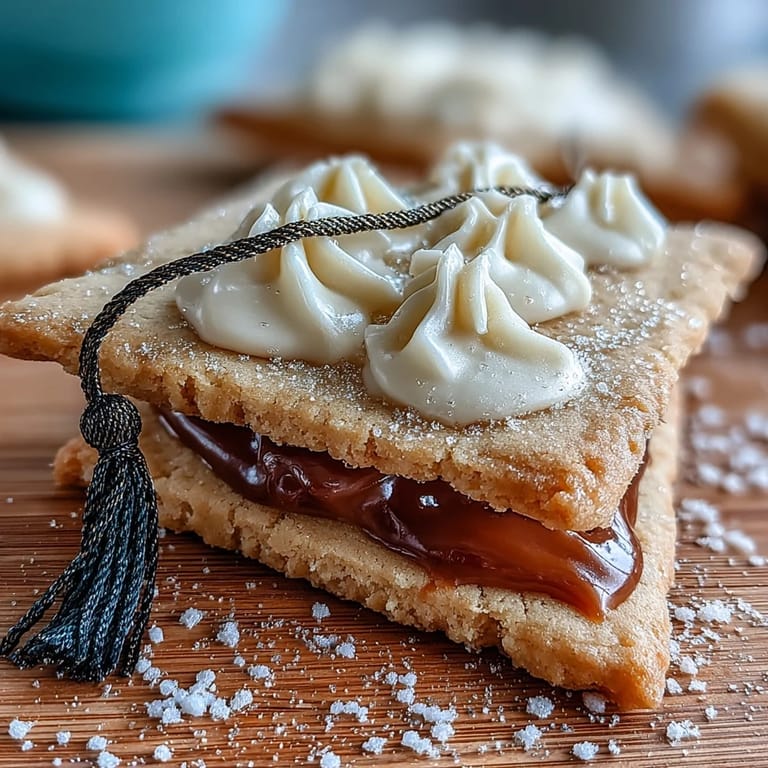
- Gold edible luster dust: The secret to those eye-catching golden tassels; mix gently with clear alcohol for painting.
Tired of Takeout? 🥡
Get 10 meals you can make faster than delivery arrives. Seriously.
One email. No spam. Unsubscribe anytime.
Instructions
- Cream Butter and Sugar:
- With the mixer whirring, blend butter and sugar until it’s pale and fluffy—listen for the beaters to shift from sandy to smooth.
- Add Eggs and Flavorings:
- Crack in the egg and pour in vanilla and almond extract, watching the mixture transform into a soft, fragrant mass.
- Incorporate Dry Ingredients:
- Slowly add flour and salt, mixing until the dough barely comes together; stop immediately for the best texture.
- Chill the Dough:
- Press the dough into discs, wrap in plastic, and chill until firm—a must for sharp shapes and easy rolling.
- Prepare Baking Sheets:
- Preheat your oven, line baking sheets with parchment, and feel the anticipation as the kitchen warms up.
- Cut and Shape:
- Roll dough to a quarter inch, then cut with diploma and cap cutters—dip the cutters in flour if shapes stick.
- Bake:
- Transfer cookies to trays, then bake just until you see the faintest golden hue at the edges; cool fully on wire racks.
- Make Royal Icing:
- Beat egg whites with powdered sugar and cream of tartar until stiff and glossy; add vanilla at the end for a boost of flavor.
- Tint and Divide Icing:
- Separate portions for black, white, and gold—remember a little color goes a long way with gel food coloring.
- Decorate:
- Pipe outlines, flood the centers, then use a fine paintbrush dipped in gold luster dust mix to finish the tassels and ribbons; let dry thoroughly before stacking.
 Bookmark
 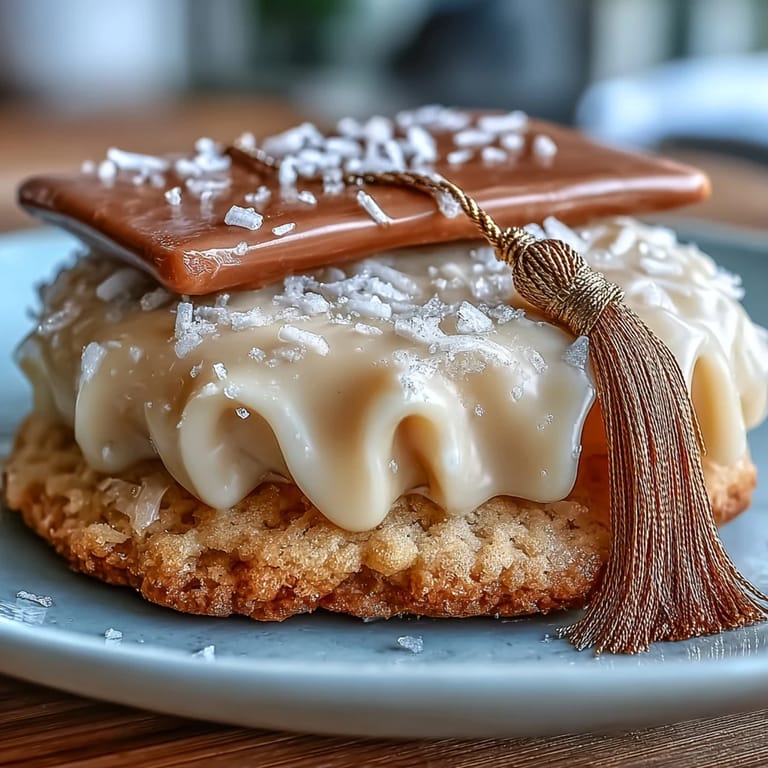 Bookmark
 Sometimes a single tray of cookies can spark a whole table of conversation. At my cousin’s graduation, the treats disappeared before the speeches even began—and suddenly, everyone (even the shyest guests) was swapping stories about their first job, favorite teacher, or biggest dream.
Making Them Shine: Tips for Gold Accents
I used to worry about the gold detail turning runny, but mixing luster dust with just a drop of clear alcohol makes a difference. Paint with a light hand and let the cookies dry untouched—resist the urge to nudge or stack them too soon for flawless, sparkling tassels.
Storing and Serving Suggestions
These cookies keep beautifully in an airtight container for up to a week, holding both shape and flavor. I sometimes slip a small piece of parchment between layers to prevent the icing from smudging when stacking for transport.
Decorating Rituals and Troubleshooting
Letting everyone in the kitchen decorate—kids, adults, anyone—always leads to the best memories and the most creative designs. Mistakes usually wind up as the tastiest cookies, so embrace dripping tassels or wild patterns for a little extra fun.
- If you’re in a hurry, set piped cookies near a fan to help the icing dry quickly.
- Keep toothpicks on hand—great for fixing tiny mistakes or popping air bubbles.
- Don’t worry if your first few cookies aren’t perfect; they’ll taste just as good.
 Bookmark
  Bookmark
 May your next batch of graduation cookies spark a round of cheers no matter the occasion. Here’s to making every milestone delicious and a little golden.
Recipe Questions
- → How do I prevent the cookies from spreading?
Keep butter at room temperature but not overly soft, chill the dough for 45 minutes before rolling, roll on a lightly floured surface to 1/4-inch, and avoid overworking the dough. Proper chilling and accurate oven temperature help maintain shape during baking.
- → What consistency is best for royal icing?
Use stiff, glossy peaks for piping outlines and firm details; thin a portion to a ribbon or flood consistency for filling. Adjust with small amounts of water or meringue powder until the icing flows slowly off a spoon.
- → How can I get a smooth flooded surface?
Pipe a slightly thicker outline first, then thin flood icing to the right consistency and fill. Use a small scribe or toothpick to spread icing and pop bubbles, and let the surface dry undisturbed until set.
- → How do I apply the gold accents?
Mix edible gold luster dust with a few drops of clear alcohol or lemon extract to form a paint. Apply with a fine food-safe brush once the icing is mostly dry, building thin layers for an even metallic finish.
- → Can I replace egg whites in the royal icing?
Yes—use meringue powder reconstituted according to the package (the listed alternative of 4 tbsp meringue powder + 6 tbsp water works well) for a stable and food-safe royal icing.
- → How should finished cookies be stored?
Store completely cooled and fully dried cookies in an airtight container at room temperature for up to one week. Layer with parchment paper to protect icing details and avoid stacking until thoroughly set.